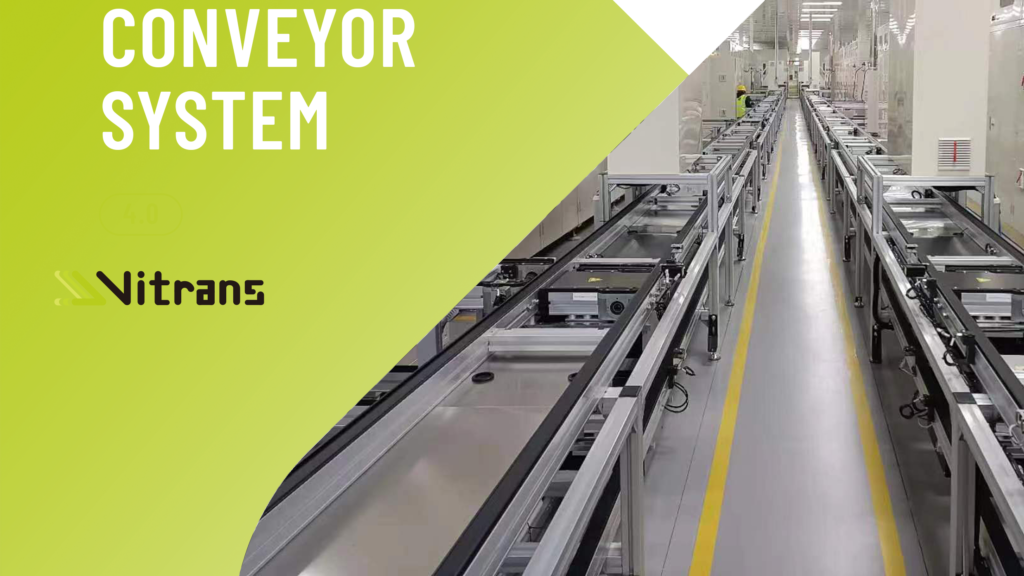
Introduction: The Hidden Cost of Rushed Installations
Your new conveyor system has arrived. Production is waiting. Every day of delay costs you $5,000 in lost output. The temptation is clear: get it installed and running as fast as possible.
But here’s the uncomfortable truth: 60% of conveyor system failures in the first 2 years are caused by installation errors, not manufacturing defects.
We’ve seen it countless times:
- A $65,000 conveyor fails after 8 months because it was mounted on an uneven floor
- A perfectly good motor burns out in 6 weeks due to incorrect voltage wiring
- A belt tracking problem causes $30,000 in product damage because guide rails were misaligned
- A workplace injury occurs because safety guards weren’t properly installed
These aren’t hypothetical scenarios—they’re real cases from our service database. And they were all preventable.
This article reveals the 8 most common and costly สายพานลำเลียง installation mistakes, explains why they happen, and shows you exactly how to avoid them. Whether you’re using in-house maintenance staff or third-party contractors, this guide will protect your investment.
Mistake #1: Skipping Site Preparation and Floor Leveling
The Error: Installing conveyor supports directly on uneven or unprepared flooring.
Why it happens:
- Pressure to start production quickly
- Assumption that “industrial floors are flat enough”
- Lack of proper measuring tools
- Underestimating the impact of minor irregularities
The Cost:
- Premature bearing failure (uneven load distribution)
- Belt tracking problems (constant drift to one side)
- Frame stress and cracking (twisting under load)
- Vibration and noise (accelerated wear on all components)
- Typical repair cost: $8,000-25,000 + 3-5 days downtime
Real example: An automotive parts manufacturer installed a 120-foot conveyor on a floor with 18mm variation over 10 meters. Within 14 months:
- 4 bearing replacements ($3,200)
- Constant belt tracking adjustments (12 hours labor/month)
- Frame crack requiring welding ($4,500)
- ต้นทุนรวม: $21,000+ vs. $800 for proper floor leveling upfront
How to Avoid It:
✅ Before installation:
- Use a laser level or transit to measure floor flatness
- Acceptable tolerance: ≤3mm variation per 3 meters (≤1/8″ per 10 feet)
- Mark high and low points on the floor
- Self-leveling compound for minor variations (<10mm)
- Steel shims or adjustable feet for larger corrections
✅ During installation:
- Use precision levels on conveyor frame (not just visual inspection)
- Check level at multiple points along entire length
- Verify frame is straight (not twisted) before tightening bolts
- Re-check after tightening (bolts can pull frame out of alignment)
✅ Pro tip: Install adjustable mounting feet—even on “level” floors. This allows fine-tuning during commissioning and future re-leveling if the floor settles.
-
 สายพานลำเลียงแบบสายพาน รุ่นทั่วไป
 -
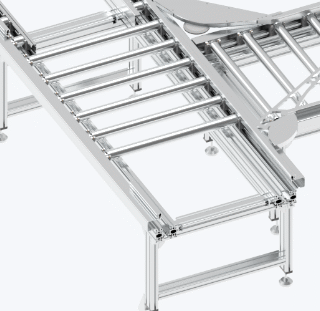 สายพานลำเลียงแบบซ้อนได้สำหรับงานหนัก
 -
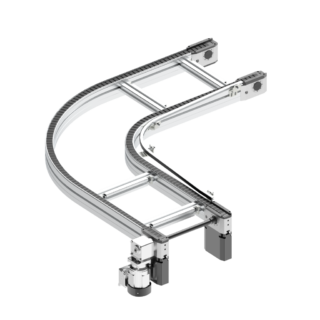 สายพานลำเลียงแบบแบนด้านบน CV2/90 องศา
 -
.1-320x320.png) สายพานลำเลียงแบบแบนด้านบน CV2/180 องศา
สายพานลำเลียงแบบแบนด้านบน CV2/180 องศา -
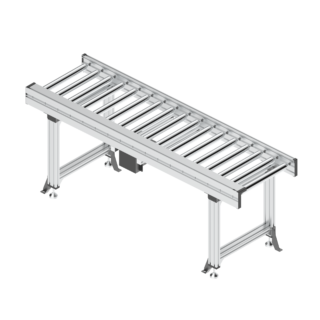 สายพานลำเลียงแบบลูกกลิ้งสำหรับงานเบา
 -
 สายพานลำเลียงพาเลทแบบแบน FC2
 -
 สายพานลำเลียงแบบลูกกลิ้ง AC2/H/สายพานลำเลียงแบบไหลอิสระ
 -
 สายพานลำเลียงแบบโซ่ลูกกลิ้ง AC2/สายพานลำเลียงแบบไหลอิสระ
 -
 สายพานลำเลียงพาเลทแบบไทม์มิ่ง BC2/สายพานลำเลียงแบบไหลอิสระ
Mistake #2: Improper Belt Tensioning
The Error: Setting belt tension too loose or too tight during initial setup.
Why it happens:
- No tension measurement tool (guessing by hand)
- Fear of overtightening leads to undertightening
- Not accounting for belt stretch during break-in period
- Following generic guidelines instead of manufacturer specs
The Cost:
Too Loose:
- Belt slippage on drive pulley (heat damage to belt)
- Poor tracking (belt wanders side-to-side)
- Product instability (items shift or fall off)
- Typical cost: $5,000-15,000 in belt replacement + downtime
Too Tight:
- Excessive bearing load (premature failure)
- Motor overload (higher energy consumption, potential burnout)
- Belt edge damage (cracking, fraying)
- Typical cost: $8,000-20,000 in bearing/motor replacement
How to Avoid It:
✅ Use proper tensioning method:
- Deflection method (most common):
- Apply specified force at belt center span
- Measure deflection distance
- Compare to manufacturer’s chart
- Example: 10 lbs force should produce 1/2″ deflection on 10-foot span
- Tension meter (most accurate):
- Sonic tension meter measures belt frequency
- Converts to tension value
- Eliminates guesswork
- Recommended for critical applications
✅ Account for break-in stretch:
- New belts stretch 1-3% during first 48 hours of operation
- Install at 70-80% of final tension
- Re-tension after 24 hours of operation
- Final tension check at 48 hours
✅ Document tension settings:
- Record final tension values
- Note date and belt serial number
- Include in preventive maintenance schedule
- Re-check tension quarterly (or per manufacturer recommendation)
Mistake #3: Misaligned Pulleys and Rollers
The Error: Pulleys and rollers not parallel to each other or perpendicular to belt travel direction.
Why it happens:
- Rushed installation (not taking time to align properly)
- Assuming factory-mounted pulleys are already aligned
- Not checking after frame assembly (frame can twist during bolting)
- Lack of proper alignment tools
The Cost:
- Severe belt tracking problems (constant adjustment needed)
- Uneven belt wear (replacement 50% sooner than expected)
- Edge damage (belt delamination, fraying)
- Product spillage (loss and cleanup labor)
- Typical cost: $6,000-18,000 annually in belt replacement + labor
How to Avoid It:
✅ Alignment procedure:
- Start with the drive pulley—this is your reference point
- Use a laser alignment tool or taut wire method
- Align tail pulley parallel to drive pulley (±0.5mm tolerance)
- Align all snub and bend pulleys to same plane
- Check idler rollers perpendicular to belt travel
✅ Verification method:
- Run belt empty for 10-15 minutes
- Observe tracking behavior
- Belt should run centered on all pulleys
- If drifting, adjust尾 pulley slightly (never adjust drive pulley!)
- Small adjustments (1-2mm) make big differences
✅ Tool recommendation:
- Laser pulley alignment tool ($300-800 investment)
- Or traditional string/wire method (free but less precise)
- Digital inclinometer for checking roller angles
Mistake #4: Incorrect Electrical Wiring and Motor Setup
The Error: Wrong voltage, phase, frequency, or improper motor protection settings.
Why it happens:
- Electrician unfamiliar with conveyor-specific requirements
- Not reading motor nameplate carefully
- Assuming “it’s just a motor” (all motors are wired the same)
- Skipping motor protection calibration
The Cost:
- Wrong voltage: Immediate motor damage ($2,000-8,000 replacement)
- Wrong phase rotation: Motor runs backward (potential equipment damage)
- No overload protection: Motor burns out under load ($3,000-10,000)
- Improper VFD settings: Motor overheating, reduced lifespan
- Safety hazard: Electrical fire or shock risk (priceless)
Real example: A food processing plant connected a 480V motor to 240V supply. Motor drew double the current, overheated, and failed after 3 weeks. Cost: $6,500 motor + $4,000 downtime + investigation revealed damaged VFD ($8,000). Total: $18,500 for a 15-minute voltage check.
How to Avoid It:
✅ Pre-installation checklist:
- Verify motor nameplate matches facility power:
- Voltage (e.g., 240V, 480V, 600V)
- Phase (single or three-phase)
- Frequency (50Hz or 60Hz)
- Full-load amps (FLA)
- Confirm disconnect switch and breaker sizing:
- Breaker: 125-150% of motor FLA
- Wire gauge: Per NEC/local code for motor amperage
- Disconnect within sight of motor (safety requirement)
- Check rotation before coupling to conveyor:
- Bump test motor (brief start)
- Verify correct rotation direction
- Reverse two leads if needed (three-phase only)
✅ VFD programming (if equipped):
- Enter motor nameplate data accurately
- Set acceleration/deceleration times appropriately
- Configure overload protection (typically 115% of FLA)
- Test all control functions (start, stop, speed adjustment)
- Document all parameter settings
✅ Safety requirements:
- Proper grounding (verify with multimeter)
- Emergency stop circuits tested and functional
- All electrical enclosures closed and secured
- Lockout/tagout points identified and labeled
Mistake #5: Inadequate Safety Guarding and Emergency Stops
The Error: Operating conveyor without proper guards, or emergency stops incorrectly wired/placed.
Why it happens:
- Guards seen as “optional” for initial testing
- Desire for easier access during setup
- Not understanding regulatory requirements (OSHA, ANSI, local codes)
- Cost-cutting mentality (“we’ll add guards later”)
The Cost:
- Workplace injury: Medical costs, workers’ comp, potential lawsuit ($50,000-$2,000,000+)
- Regulatory fines: OSHA violations ($13,000+ per violation, willful violations up to $130,000)
- Facility shutdown: Until violations corrected (days or weeks of lost production)
- Reputation damage: Difficulty hiring, increased insurance premiums
This is not an area to cut corners.
How to Avoid It:
✅ Required safety features:
- Pinch point guards: All nip points where belt contacts pulleys
- Side guards: Prevent contact with moving belt (especially at loading/unloading points)
- Underside guards: Protect from return belt and rotating shafts
- Emergency stop cables: Along entire conveyor length (pull-cable style)
- Local E-stop buttons: At operator stations and hazard points
✅ E-stop wiring requirements:
- Hard-wired (not through PLC—must be fail-safe)
- Category 0 or Category 1 stop per ANSI B11.19
- Tested weekly (document testing)
- Clearly labeled and accessible
- Reset requires manual intervention (can’t auto-restart)
✅ Compliance standards:
- USA: OSHA 1910.219 (mechanical power transmission), ANSI B20.1 (conveyor safety)
- Europe: CE marking, EN 619 (bulk material handling), EN ISO 13849 (safety controls)
- Other regions: Check local regulations
✅ Never operate without:
- All guards in place and secured
- E-stops tested and functional
- Warning labels visible and legible
- Operators trained on safety procedures
Mistake #6: Poor Lubrication Practices During Installation
The Error: Over-lubricating, under-lubricating, or using wrong lubricant type on bearings and gearboxes.
Why it happens:
- “More is better” misconception (leads to over-greasing)
- Not purging old grease before adding new
- Using general-purpose grease instead of specified type
- Forgetting to lubricate sealed components that actually require it
The Cost:
- Over-lubrication: Heat buildup, seal damage, grease contamination of product ($5,000-15,000)
- Under-lubrication: Premature bearing failure ($3,000-12,000 per bearing + downtime)
- Wrong lubricant: Reduced effectiveness, potential chemical incompatibility
- Food/pharma contamination: Product recall, regulatory action ($100,000+)
How to Avoid It:
✅ Follow manufacturer specifications:
- Use exact grease/oil type specified (NLGI grade, viscosity, additives)
- Food-grade applications require H1-certified lubricants
- High-temperature or washdown environments need special formulations
✅ Proper greasing technique:
- Clean grease fitting before applying gun
- Purge old grease until fresh grease appears at seal
- Don’t exceed recommended volume (typically 1-3 pumps per fitting)
- Wipe away excess grease (prevents dust accumulation)
- Run equipment briefly to distribute grease, then re-check
✅ Lubrication schedule:
- Initial lubrication at installation (per manual)
- Break-in period re-lube (after 100 operating hours)
- Regular PM schedule (quarterly, semi-annual, or per hours-of-operation)
- Document all lubrication activities
✅ Common mistakes to avoid:
- ❌ Mixing incompatible grease types (can solidify or lose properties)
- ❌ Greasing while equipment is running (safety hazard, uneven distribution)
- ❌ Using compressed air to clean bearings (forces contaminants inside)
- ❌ Ignoring gearbox oil levels (check before first start!)
Mistake #7: Skipping Commissioning Tests and Documentation
The Error: Putting conveyor directly into production without proper testing and baseline documentation.
Why it happens:
- Production pressure (“we need this running NOW”)
- Assumption that “it looks fine, so it must be fine”
- Not knowing what tests to perform
- Wanting to avoid finding problems (ignorance is bliss mentality)
The Cost:
- Undetected issues become catastrophic failures (10x repair cost)
- No baseline for troubleshooting future problems
- Warranty claims denied (can’t prove issue wasn’t installation-related)
- Extended downtime when problems eventually surface
- Typical cost: $10,000-50,000+ when hidden failures occur
How to Avoid It:
✅ Commissioning checklist (minimum requirements):
Mechanical tests:
- Visual inspection (all bolts tightened, guards installed, no debris)
- Manual belt rotation (smooth, no binding or rubbing)
- Empty run test (15-30 minutes, check tracking, noise, vibration)
- Load test (25%, 50%, 75%, 100% of rated capacity)
- Emergency stop function test (all E-stops verified)
Electrical tests:
- Voltage verification at motor terminals
- Current draw measurement (compare to nameplate FLA)
- VFD parameter review (if equipped)
- Control function test (all buttons, switches, indicators)
- Ground fault testing
Performance tests:
- Speed verification (tachometer reading matches specification)
- Belt tracking stability (no adjustment needed after 30 minutes)
- Noise level measurement (within acceptable range)
- Temperature check (bearings, motor, gearbox after 1 hour run)
✅ Documentation to create:
- Installation report (date, installer, deviations from plan)
- As-built drawings (any field modifications noted)
- Test results (all measurements recorded)
- Photos (key connections, settings, overall installation)
- Warranty registration (submit to manufacturer)
- Maintenance manual (file with facility documentation)
✅ Break-in period protocol:
- First 24 hours: Run at 50-60% capacity
- Inspect after 8 hours (belt tension, bolt tightness, temperature)
- Re-tension belt if needed (most stretch occurs in first day)
- After 48 hours: Increase to 75% capacity
- After 1 week: Full capacity operation approved
Mistake #8: Not Training Operators and Maintenance Staff
The Error: Handing over a newly installed conveyor without proper training on operation, monitoring, and basic maintenance.
Why it happens:
- Assumption that “conveyors are simple, everyone knows how they work”
- Training seen as optional cost rather than essential investment
- Turnover expectation (“they’ll learn from the previous guy”)
- No formal training program exists
The Cost:
- Improper operation causes premature wear (20-40% reduced lifespan)
- Minor issues escalate to major failures (lack of early detection)
- Safety incidents from uninformed operators
- Maintenance staff performing incorrect procedures
- Typical cost: $15,000-40,000 annually in avoidable repairs and downtime
How to Avoid It:
✅ Operator training (minimum 2-4 hours):
- System overview: Purpose, capacity, limitations
- Start/stop procedures: Normal and emergency sequences
- Loading guidelines: Proper placement, weight limits, spacing
- Monitoring: What normal looks/sounds like, warning signs
- Basic troubleshooting: Jam clearing, simple adjustments
- Safety protocols: E-stop usage, lockout/tagout, hazard awareness
- Reporting: Who to contact for problems, what information to provide
✅ Maintenance staff training (minimum 4-8 hours):
- Preventive maintenance schedule: Tasks, frequencies, procedures
- Lubrication: Types, locations, quantities, techniques
- Belt tracking: Adjustment procedure, common causes of drift
- Tension checking: Method, frequency, target values
- Wear inspection: What to look for, measurement techniques, replacement criteria
- Troubleshooting: Diagnostic flowcharts, common problems and solutions
- Parts identification: Exploded views, part numbers, ordering process
- Documentation: Log keeping, work order completion, history tracking
✅ Training documentation:
- Attendance records (who was trained, when, by whom)
- Training materials (manuals, videos, checklists provided)
- Competency verification (written test or practical demonstration)
- Refresher schedule (annual re-training recommended)
- Update notifications (when procedures change)
✅ Knowledge retention:
- Quick-reference guides posted at operator stations
- Laminated checklists in maintenance shop
- Video library accessible on tablets/phones
- Mentorship program (experienced staff paired with new hires)
Conclusion: Installation Quality Determines Equipment Lifespan
The harsh reality: A $100,000 conveyor installed poorly will perform worse than a $50,000 conveyor installed correctly.
Installation isn’t just about getting equipment running—it’s about:
- Maximizing return on your capital investment
- Ensuring worker safety and regulatory compliance
- Minimizing lifetime operating costs
- Building a foundation for reliable production
The 8 mistakes in this article cost manufacturers an average of $85,000 per incident (based on our service database of 500+ conveyor installations). Almost every single one was preventable with proper planning, patience, and adherence to best practices.
Your action plan:
- Review this checklist before your next installation
- Share with installation team (internal or contractor)
- Build these checks into your standard operating procedures
- Don’t let production pressure compromise installation quality
- Document everything—future you will thank present you
Call to Action
Planning a conveyor installation? Vitrans provides comprehensive installation support including:
- ✅ Pre-installation site assessment
- ✅ Detailed installation manuals and drawings
- ✅ Remote or on-site installation supervision
- ✅ Commissioning and performance testing
- ✅ Operator and maintenance training programs
Don’t leave your investment to chance. Contact our engineering team to discuss your installation requirements and ensure your conveyor system delivers decades of reliable service.
📧 Email: qingsong.xu@vitrans.cn📞 Phone: +86 18027652537 🌐 Website: https://www.vitrans-conveyor.com/