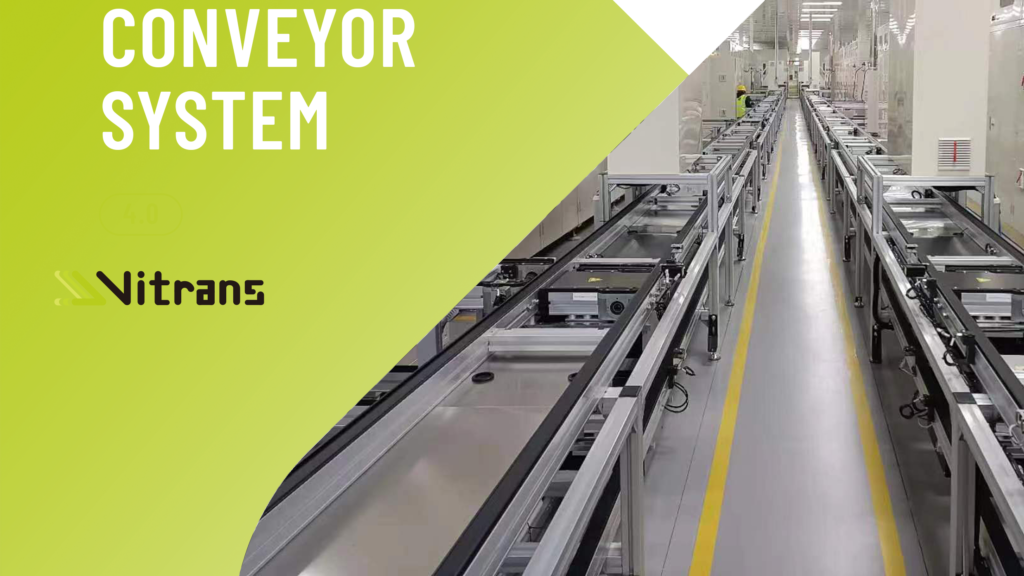
Introdução: O custo oculto das instalações apressadas
Chegou o seu novo sistema de transporte. A produção está à espera. Cada dia de atraso custa-lhe $5,000 em produção perdida. A tentação é clara: instalá-lo e pô-lo a funcionar o mais rapidamente possível.
Mas aqui está a verdade incómoda: 60% das falhas de sistemas de transporte nos primeiros 2 anos são causadas por erros de instalação, e não defeitos de fabrico.
Já o vimos inúmeras vezes:
- Um transportador $65.000 avaria após 8 meses porque foi montado num piso irregular
- Um motor em perfeitas condições queima-se em 6 semanas devido a uma cablagem com tensão incorrecta
- Um problema de seguimento da correia causa $30.000 em danos no produto porque as calhas de guia estavam desalinhadas
- Um acidente de trabalho ocorre porque as protecções de segurança não foram corretamente instaladas
Estes não são cenários hipotéticos - são casos reais da nossa base de dados de serviços. E todos eles podiam ser evitados.
Este artigo revela o 8 mais comuns e dispendiosos transportador erros de instalação, Este guia explica por que razão acontecem e mostra-lhe exatamente como evitá-los. Quer utilize pessoal de manutenção interno ou contratantes externos, este guia protegerá o seu investimento.
Erro #1: Saltar a preparação do local e o nivelamento do pavimento
O erro: Instalação de suportes de transporte diretamente sobre pavimentos irregulares ou não preparados.
Porque é que isso acontece:
- Pressão para iniciar rapidamente a produção
- Pressuposto de que “os pavimentos industriais são suficientemente planos”
- Falta de ferramentas de medição adequadas
- Subestimar o impacto de irregularidades menores
O custo:
- Falha prematura do rolamento (distribuição desigual da carga)
- Problemas de seguimento da correia (desvio constante para um lado)
- Tensões e fissuras na estrutura (torção sob carga)
- Vibração e ruído (desgaste acelerado de todos os componentes)
- Custo típico de reparação: $8,000-25,000 + 3-5 dias de inatividade
Exemplo real: Um fabricante de peças para automóveis instalou um transportador de 120 pés num piso com uma variação de 18 mm ao longo de 10 metros. Em 14 meses:
- 4 substituições de rolamentos ($3,200)
- Ajustes constantes do seguimento da correia (12 horas de trabalho/mês)
- Fissura no quadro que requer soldadura ($4,500)
- Custo total: $21.000+ vs. $800 para um nivelamento adequado do pavimento à partida
Como evitá-lo:
✅ Antes da instalação:
- Utilizar um nível laser ou uma trena para medir o nivelamento do pavimento
- Tolerância aceitável: variação ≤3mm por 3 metros (≤1/8″ por 10 pés)
- Marcar pontos altos e baixos no chão
- Composto autonivelante para pequenas variações (<10mm)
- Calços de aço ou pés ajustáveis para correcções maiores
✅ Durante a instalação:
- Utilizar níveis de precisão na estrutura do transportador (não apenas inspeção visual)
- Verificar o nível em vários pontos ao longo de todo o comprimento
- Verificar se a estrutura está direita (não torcida) antes de apertar os parafusos
- Verificar novamente após o aperto (os parafusos podem desalinhar o quadro)
✅ Profissional dica: Instale pés de montagem ajustáveis - mesmo em pisos “nivelados”. Isto permite uma afinação fina durante a colocação em funcionamento e um futuro nivelamento se o chão assentar.
-
 Transportador de correia Série geral
 -
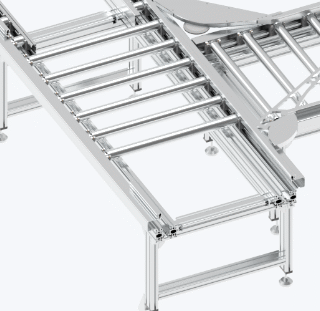 Transportador de rolos empilháveis para serviço pesado
 -
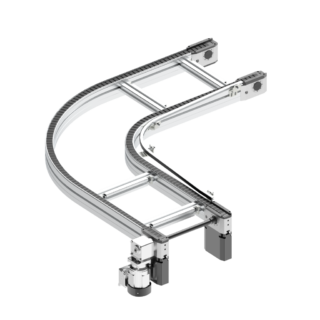 CV2/90 Degree Flat Top Chain Conveyor Curve
 -
.1-320x320.png) CV2/180 Degree Flat Top Chain Conveyor Curve
CV2/180 Degree Flat Top Chain Conveyor Curve -
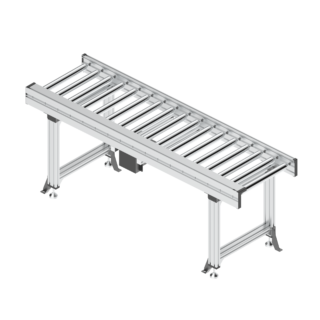 Transportador de rolos para trabalhos ligeiros
 -
 Transportador de paletes de correia plana FC2
 -
 AC2/H Transportador de corrente de rolos// Transportador de fluxo livre
 -
 Transportador de paletes com corrente de rolos AC2 / Transportador de fluxo livre
 -
 BC2 Transportador de paletes com correia dentada/Transportador de fluxo livre
Erro #2: Tensão incorrecta da correia
O erro: Definição da tensão da correia demasiado frouxa ou demasiado apertada durante a configuração inicial.
Porque é que isso acontece:
- Sem ferramenta de medição da tensão (adivinhação à mão)
- O medo do aperto excessivo leva ao aperto insuficiente
- Não tem em conta a elasticidade da correia durante o período de amaciamento
- Seguir diretrizes genéricas em vez das especificações do fabricante
O custo:
Demasiado solto:
- Deslizamento da correia na polia de acionamento (danos térmicos na correia)
- Má trajetória (a correia oscila de um lado para o outro)
- Instabilidade do produto (os artigos deslocam-se ou caem)
- Custo típico: $5,000-15,000 em substituição da correia + tempo de inatividade
Demasiado apertado:
- Carga excessiva do rolamento (falha prematura)
- Sobrecarga do motor (maior consumo de energia, potencial de desgaste)
- Danos nos bordos da correia (fissuras, desgaste)
- Custo típico: $8,000-20,000 para substituição de rolamentos/motor
Como evitá-lo:
✅ Utilizar um método de tensionamento correto:
- Deflexão método (mais comum):
- Aplicar a força especificada no centro do vão da correia
- Medir a distância de deflexão
- Comparar com a tabela do fabricante
- Exemplo: uma força de 10 lbs deve produzir uma deflexão de 1/2″ num vão de 10 pés
- Medidor de tensão (mais exato):
- O medidor de tensão sónica mede a frequência da correia
- Converte para valor de tensão
- Elimina a adivinhação
- Recomendado para aplicações críticas
✅ Ter em conta a elasticidade de amaciamento:
- As novas correias esticam 1-3% durante as primeiras 48 horas de funcionamento
- Instalar a 70-80% da tensão final
- Re-tensão após 24 horas de funcionamento
- Controlo final da tensão às 48 horas
✅ Definições de tensão do documento:
- Registar os valores da tensão final
- Anotar a data e o número de série da correia
- Incluir no programa de manutenção preventiva
- Verificar novamente a tensão trimestralmente (ou de acordo com a recomendação do fabricante)
Erro #3: Polias e rolos desalinhados
O erro: As polias e os rolos não são paralelos entre si ou perpendiculares à direção de deslocação da correia.
Porque é que isso acontece:
- Instalação apressada (sem tempo para alinhar corretamente)
- Partindo do princípio de que as polias montadas na fábrica já estão alinhadas
- Não controlo após a montagem do quadro (o quadro pode torcer-se durante a aparafusagem)
- Falta de ferramentas de alinhamento adequadas
O custo:
- Problemas graves de seguimento da correia (é necessário um ajuste constante)
- Desgaste irregular da correia (substituição do 50% mais cedo do que o previsto)
- Danos nos bordos (delaminação da correia, desgaste)
- Derrame de produtos (perda e trabalho de limpeza)
- Custo típico: $6,000-18,000 anualmente em substituição de correias + mão de obra
Como evitá-lo:
✅ Procedimento de alinhamento:
- Comece pela polia de acionamento-Este é o seu ponto de referência
- Utilizar uma ferramenta de alinhamento a laser ou o método do fio esticado
- Alinhar a polia traseira paralelamente à polia motriz (tolerância de ±0,5 mm)
- Alinhar todas as roldanas e polias de dobragem no mesmo plano
- Verificar os rolos de polia perpendiculares ao curso da correia
✅ Método de verificação:
- Deixar a correia em vazio durante 10-15 minutos
- Observar o comportamento de seguimento
- A correia deve estar centrada em todas as polias
- Se estiver à deriva, ajustar ligeiramente a polia (nunca ajustar a polia de acionamento!)
- Pequenos ajustes (1-2mm) fazem grandes diferenças
✅ Recomendação de ferramentas:
- Ferramenta de alinhamento de polias a laser (investimento $300-800)
- Ou o método tradicional com fio (gratuito mas menos preciso)
- Inclinómetro digital para verificar os ângulos dos rolos
Erro #4: Cablagem eléctrica e configuração do motor incorrectas
O erro: Tensão, fase, frequência ou definições de proteção do motor incorrectas.
Porque é que isso acontece:
- Eletricista não familiarizado com os requisitos específicos dos transportadores
- Não ler cuidadosamente a placa de identificação do motor
- Partindo do princípio de que “é apenas um motor” (todos os motores têm a mesma cablagem)
- Saltar a calibração da proteção do motor
O custo:
- Tensão incorrecta: Danos imediatos no motor ($2,000-8,000 substituição)
- Rotação de fase incorrecta: O motor funciona ao contrário (possíveis danos no equipamento)
- Sem proteção contra sobrecarga: O motor queima-se sob carga ($3,000-10,000)
- Definições incorrectas do VFD: Sobreaquecimento do motor, redução do tempo de vida útil
- Perigo para a segurança: Risco de incêndio ou choque elétrico (não tem preço)
Exemplo real: Uma fábrica de transformação de alimentos ligou um motor de 480V a uma alimentação de 240V. O motor consumiu o dobro da corrente, sobreaqueceu e avariou após 3 semanas. Custo: $6,500 motor + $4,000 tempo de inatividade + investigação revelou VFD danificado ($8,000). Total: $18.500 para uma verificação de tensão de 15 minutos.
Como evitá-lo:
✅ Lista de controlo de pré-instalação:
- Verifique se a placa de identificação do motor corresponde à potência da instalação:
- Tensão (por exemplo, 240V, 480V, 600V)
- Fase (monofásica ou trifásica)
- Frequência (50Hz ou 60Hz)
- Amperes de carga total (FLA)
- Confirmar o dimensionamento do interrutor de corte e do disjuntor:
- Disjuntor: 125-150% de FLA do motor
- Bitola do fio: De acordo com a NEC/código local para a amperagem do motor
- Desligar à vista do motor (requisito de segurança)
- Verificar a rotação antes de acoplar ao transportador:
- Motor de teste de impacto (arranque breve)
- Verificar o sentido de rotação correto
- Inverter dois cabos, se necessário (apenas trifásico)
✅ Programação do VFD (se equipado):
- Introduzir corretamente os dados da placa de identificação do motor
- Definir corretamente os tempos de aceleração/desaceleração
- Configurar a proteção contra sobrecarga (tipicamente 115% de FLA)
- Testar todas as funções de controlo (arranque, paragem, regulação da velocidade)
- Documentar todos os ajustes dos parâmetros
✅ Requisitos de segurança:
- Ligação à terra correta (verificar com multímetro)
- Circuitos de paragem de emergência testados e funcionais
- Todos os invólucros eléctricos fechados e protegidos
- Pontos de bloqueio/etiquetagem identificados e etiquetados
Erro #5: Guardas de segurança e paragens de emergência inadequadas
O erro: Funcionamento do transportador sem protecções adequadas ou paragens de emergência incorretamente ligadas/colocadas.
Porque é que isso acontece:
- Protecções consideradas “opcionais” nos primeiros ensaios
- Desejo de um acesso mais fácil durante a configuração
- Não compreender os requisitos regulamentares (OSHA, ANSI, códigos locais)
- Mentalidade de redução de custos (“acrescentaremos guardas mais tarde”)
O custo:
- Acidentes de trabalho: Custos médicos, seguro de acidentes de trabalho, ação judicial potencial ($50,000-$2,000,000+)
- Coimas regulamentares: Violações da OSHA ($13,000+ por violação, violações intencionais até $130,000)
- Encerramento da instalação: Até que as infracções sejam corrigidas (dias ou semanas de produção perdida)
- Danos à reputação: Dificuldade de contratação, aumento dos prémios de seguro
Este não é um domínio em que se deva cortar nos pormenores.
Como evitá-lo:
✅ Caraterísticas de segurança exigidas:
- Guarda-redes de topo de gama: Todos os pontos de aperto onde a correia entra em contacto com as polias
- Protecções laterais: Evitar o contacto com a correia em movimento (especialmente nos pontos de carga/descarga)
- Protecções inferiores: Proteger da correia de retorno e dos veios rotativos
- Cabos de paragem de emergência: Ao longo de todo o comprimento do transportador (estilo cabo de tração)
- Botões locais de paragem de emergência: Nos postos do operador e nos pontos de perigo
✅ Requisitos da cablagem de paragem de emergência:
- Cablagem fixa (não através de PLC - deve ser à prova de falhas)
- Paragem de categoria 0 ou categoria 1 de acordo com a norma ANSI B11.19
- Testado semanalmente (teste de documentos)
- Claramente rotulado e acessível
- A reinicialização requer intervenção manual (não é possível reiniciar automaticamente)
✅ Normas de conformidade:
- EUA: OSHA 1910.219 (transmissão de energia mecânica), ANSI B20.1 (segurança de transportadores)
- Europa: Marcação CE, EN 619 (manuseamento de materiais a granel), EN ISO 13849 (controlos de segurança)
- Outras regiões: Verificar a regulamentação local
✅ Nunca funcionar sem:
- Todos os protectores no lugar e fixados
- Paragens de emergência testadas e funcionais
- Etiquetas de aviso visíveis e legíveis
- Operadores formados em procedimentos de segurança
Erro #6: Práticas de lubrificação deficientes durante a instalação
O erro: Sobre-lubrificação, sub-lubrificação ou utilização de um tipo de lubrificante incorreto nas chumaceiras e caixas de velocidades.
Porque é que isso acontece:
- “A ideia errada de que ”mais é melhor" (leva a um excesso de lubrificação)
- Não purgar a massa lubrificante antiga antes de adicionar a nova
- Utilização de massa lubrificante de uso geral em vez do tipo especificado
- Esquecer-se de lubrificar os componentes selados que efetivamente necessitam de lubrificação
O custo:
- Lubrificação excessiva: Acumulação de calor, danos nos vedantes, contaminação do produto com gordura ($5,000-15,000)
- Sub-lubrificação: Falha prematura do rolamento ($3,000-12,000 por rolamento + tempo de inatividade)
- Lubrificante incorreto: Eficácia reduzida, potencial incompatibilidade química
- Contaminação alimentar/farmacêutica: Recolha de produtos, ação regulamentar ($100,000+)
Como evitá-lo:
✅ Seguir as especificações do fabricante:
- Utilizar o tipo exato de massa lubrificante/óleo especificado (grau NLGI, viscosidade, aditivos)
- As aplicações de qualidade alimentar requerem lubrificantes com certificação H1
- Os ambientes de alta temperatura ou de lavagem necessitam de formulações especiais
✅ Técnica de lubrificação correta:
- Limpar a junta de lubrificação antes de aplicar a pistola
- Purgar a massa antiga até aparecer massa fresca no vedante
- Não exceder o volume recomendado (normalmente 1-3 bombas por acessório)
- Limpar o excesso de gordura (evita a acumulação de pó)
- Fazer funcionar o equipamento por breves instantes para distribuir a massa lubrificante e, em seguida, voltar a verificar
✅ Calendário de lubrificação:
- Primeira lubrificação aquando da instalação (segundo o manual)
- Período de amaciamento Lubrificar novamente (após 100 horas de funcionamento)
- Calendário PM regular (trimestral, semestral ou por horas de funcionamento)
- Documentar todas as actividades de lubrificação
✅ Erros comuns a evitar:
- Mistura de tipos de massa incompatíveis (pode solidificar ou perder propriedades)
- Lubrificação com o equipamento em funcionamento (risco de segurança, distribuição desigual)
- Utilizar ar comprimido para limpar os rolamentos (força os contaminantes para dentro)
- Ignorar os níveis de óleo da caixa de velocidades (verificar antes do primeiro arranque!)
Erro #7: Ignorar os testes de comissionamento e a documentação
O erro: Colocar o transportador diretamente em produção sem os devidos testes e documentação de base.
Porque é que isso acontece:
- Pressão de produção (“precisamos que isto funcione AGORA”)
- Assunção de que “parece bem, por isso deve estar bem”
- Não saber quais os testes a efetuar
- Querer evitar encontrar problemas (mentalidade de ignorância)
O custo:
- Os problemas não detectados tornam-se falhas catastróficas (custo de reparação 10 vezes superior)
- Não existe uma base de referência para a resolução de problemas futuros
- Reclamações de garantia recusadas (não é possível provar que o problema não estava relacionado com a instalação)
- Tempo de inatividade prolongado quando os problemas acabam por surgir
- Custo típico: $10.000-50.000+ quando ocorrem falhas ocultas
Como evitá-lo:
✅ Lista de controlo da entrada em funcionamento (requisitos mínimos):
Ensaios mecânicos:
- Inspeção visual (todos os parafusos apertados, protecções instaladas, sem detritos)
- Rotação manual da correia (suave, sem atrito ou fricção)
- Teste de funcionamento em vazio (15-30 minutos, verificar a trajetória, o ruído, a vibração)
- Ensaio de carga (25%, 50%, 75%, 100% da capacidade nominal)
- Ensaio da função de paragem de emergência (todas as paragens de emergência verificadas)
Ensaios eléctricos:
- Verificação da tensão nos terminais do motor
- Medição do consumo de corrente (comparar com a placa de identificação FLA)
- Revisão dos parâmetros do VFD (se equipado)
- Teste da função de controlo (todos os botões, interruptores, indicadores)
- Ensaio de defeitos à terra
Testes de desempenho:
- Verificação da velocidade (a leitura do tacómetro corresponde à especificação)
- Estabilidade de seguimento do cinto (não é necessário qualquer ajuste após 30 minutos)
- Medição do nível de ruído (dentro de um intervalo aceitável)
- Controlo da temperatura (rolamentos, motor, caixa de velocidades após 1 hora de funcionamento)
✅ Documentação a criar:
- Relatório de instalação (data, instalador, desvios em relação ao plano)
- Desenhos "as-built" (quaisquer alterações no terreno assinaladas)
- Resultados dos ensaios (todas as medições registadas)
- Fotografias (ligações principais, definições, instalação geral)
- Registo da garantia (apresentar ao fabricante)
- Manual de manutenção (ficheiro com a documentação da instalação)
✅ Protocolo do período de amaciamento:
- Primeiras 24 horas: Funcionamento a 50-60% de capacidade
- Inspeção após 8 horas (tensão da correia, aperto dos parafusos, temperatura)
- Reapertar o cinto, se necessário (a maior parte do alongamento ocorre no primeiro dia)
- Após 48 horas: Aumento da capacidade para 75%
- Após 1 semana: Aprovado o funcionamento a plena capacidade
Erro #8: Não formar os operadores e o pessoal de manutenção
O erro: Entrega de um transportador recém-instalado sem formação adequada sobre o funcionamento, a monitorização e a manutenção básica.
Porque é que isso acontece:
- Pressuposto de que “os transportadores são simples, toda a gente sabe como funcionam”
- A formação é vista como um custo opcional em vez de um investimento essencial
- Expectativa de rotatividade (“eles aprenderão com o anterior”)
- Não existe um programa de formação formal
O custo:
- O funcionamento incorreto provoca um desgaste prematuro (20-40% vida útil reduzida)
- Os problemas menores transformam-se em falhas graves (falta de deteção precoce)
- Incidentes de segurança causados por operadores desinformados
- O pessoal de manutenção executa procedimentos incorrectos
- Custo típico: $15.000-40.000 anualmente em reparações e tempos de inatividade evitáveis
Como evitá-lo:
✅ Formação de operadores (mínimo 2-4 horas):
- Visão geral do sistema: Objetivo, capacidade, limitações
- Procedimentos de arranque/paragem: Sequências normais e de emergência
- Diretrizes de carregamento: Colocação correta, limites de peso, espaçamento
- Controlo: O que é que parece/será normal, sinais de alerta
- Resolução de problemas básicos: Eliminação de encravamentos, ajustes simples
- Protocolos de segurança: Utilização da paragem de emergência, bloqueio/etiquetagem, sensibilização para os perigos
- Relatórios: Quem contactar em caso de problemas, que informações fornecer
✅ Formação do pessoal de manutenção (mínimo 4-8 horas):
- Calendário de manutenção preventiva: Tarefas, frequências, procedimentos
- Lubrificação: Tipos, localizações, quantidades, técnicas
- Seguimento do cinto: Procedimento de regulação, causas comuns de desvios
- Controlo da tensão: Método, frequência, valores-alvo
- Inspeção do desgaste: O que procurar, técnicas de medição, critérios de substituição
- Resolução de problemas: Fluxogramas de diagnóstico, problemas comuns e soluções
- Identificação das peças: Vistas explodidas, números de peças, processo de encomenda
- Documentação: Manutenção de registos, conclusão de ordens de trabalho, acompanhamento do histórico
✅ Documentação de formação:
- Registos de assiduidade (quem recebeu formação, quando, por quem)
- Materiais de formação (manuais, vídeos, listas de controlo)
- Verificação de competências (teste escrito ou demonstração prática)
- Programa de atualização (recomenda-se uma reciclagem anual)
- Notificações de atualização (quando os procedimentos são alterados)
✅ Retenção de conhecimentos:
- Guias de consulta rápida afixados nas estações dos operadores
- Listas de controlo laminadas na oficina de manutenção
- Videoteca acessível em tablets/telemóveis
- Programa de tutoria (pessoal experiente emparelhado com novas contratações)
Conclusão: A qualidade da instalação determina a vida útil do equipamento
A dura realidade: Um transportador $100.000 mal instalado terá um desempenho pior do que um transportador $50.000 instalado corretamente.
A instalação não se limita a pôr o equipamento a funcionar - trata-se de:
- Maximizar o retorno do seu investimento de capital
- Garantir a segurança dos trabalhadores e a conformidade regulamentar
- Minimização dos custos de funcionamento ao longo da vida útil
- Construir uma base para uma produção fiável
Os 8 erros referidos neste artigo custam aos fabricantes uma média de $85.000 por incidente (com base na nossa base de dados de serviços de mais de 500 instalações de transportadores). Quase todos os casos eram evitáveis com um planeamento adequado, paciência e adesão às melhores práticas.
O seu plano de ação:
- Reveja esta lista de verificação antes da sua próxima instalação
- Partilhar com a equipa de instalação (interna ou contratada)
- Inclua estas verificações nos seus procedimentos operacionais normais
- Não deixe que a pressão da produção comprometa a qualidade da instalação
- Documentar tudo - o futuro agradecer-lhe-á o presente
Apelo à ação
Está a planear a instalação de um transportador? A Vitrans oferece um apoio completo à instalação, incluindo:
- Avaliação do local de pré-instalação
- Manuais e desenhos pormenorizados de instalação
- Supervisão da instalação à distância ou no local
- Colocação em funcionamento e teste de desempenho
- Programas de formação de operadores e de manutenção
Não deixe o seu investimento ao acaso. Contacte a nossa equipa de engenharia para discutir os seus requisitos de instalação e garantir que o seu sistema de transporte proporciona décadas de serviço fiável.
📧 Email: qingsong.xu@vitrans.cn📞 Telefone: +86 18027652537 🌐 Sítio Web: https://www.vitrans-conveyor.com/